How to relaunch your listings
We’ve made some awesome improvements to our platform to make it easier than ever to design, launch, and promote your merch. But as we move to a more dynamnic system, some listings will need to be relaunched in order to stay active.
Read through the blog below for step-by-step instructions to learn how to identify which listings need to be relaunched, save your designs, relaunch your listings, and update all your URLs and Pixels.
What listings need to be relaunched?
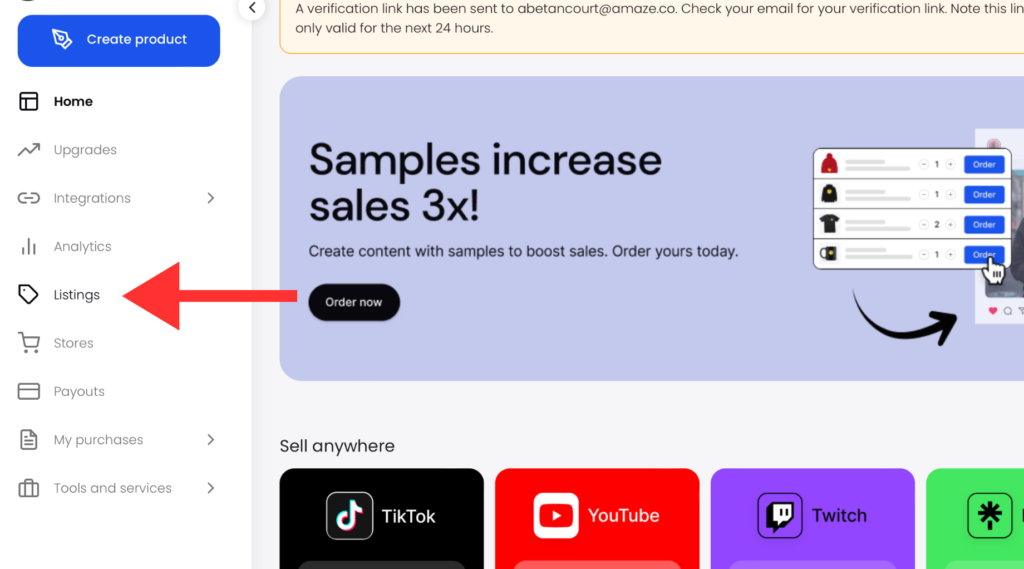
To view your listings and check if any need to be relaunched, sign into your Spring account and click “Listings” on the on the lefthand menu.
Next, click the “Show Active” filter and change it to “Old Teespring Designer.”
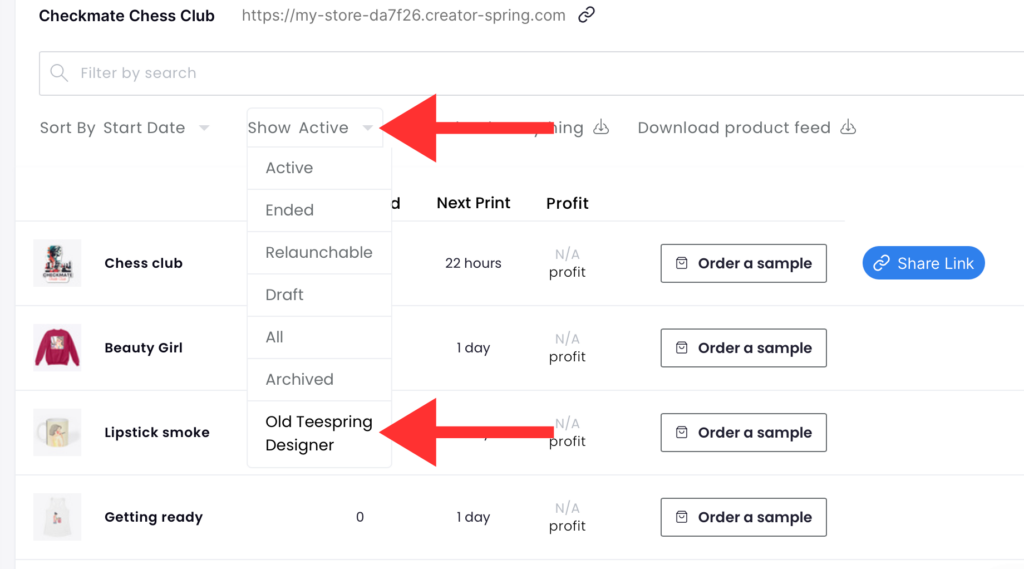
If you see an icon of a red triangle with an exclamation point beside any of your listings, you’ll need to relaunch them (see image below).

Relaunching will only take a few minutes. Follow the steps below to ensure your creations remain active. Don’t forget the last step, as skipping it might render your original URLs inactive.
How to save your designs
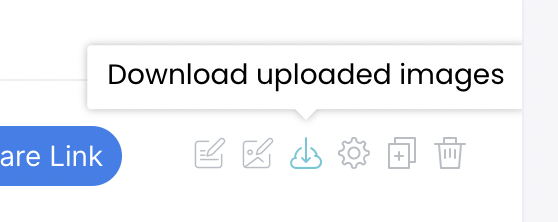
If you don’t have your artwork, you can quickly save it by clicking the download icon next to your listing.
You may need to allow pop-ups if you’re downloading several images.
These images can then be used to relaunch your listings.
NOTE: If you don’t see the download icon, this means the design was created with images or text from the old Teespring designer and there’s no file to download. You’ll need to remake that listing from scratch in our current design launcher.
How to relaunch a listing
Relaunching a listing is easy. Follow these steps to quickly get your new listing live:
- Click “Create” on the left menu.
- Pick a product.
- Upload your artwork or add text.
- Choose colors, set your price, and currency.
- Click “advanced” for display options in your store.
- Hit “Continue.”
- Add more products if you want the same design on them.
- Hit “Continue” again.
- Enter a product description and title.
- Click “Launch,” and you’re live!
Update your URL and Pixels
This is one of the most important steps because any listing that becomes inactive will have links that no longer work. Instead of updating all of your links in your link in bio, website, social profiles, and anywhere else you share your merch, just follow the steps below to update your new listing with your original link.
How to change your url
- Click “Edit Details” on your original listing.
- Copy your URL.
- Add “-old” to your original URL and click “Save.”
- Go to “Edit Details” on your new listing, paste your original URL, and click “Save.”
How to update pixels
- Click “Settings” on your original listing.
- Remove pixels, as needed.
- Click “Settings” on your new listing.
- Add pixels, as needed.
Once this step is complete, you can delete your old listings by clicking Settings, End the listing.
Take a look at our step-by-step visual overview:
