3 ways to customize (and optimize) your store
custom domain, custom store, custom stores, design store, domain, store design
Picture this: you walk into a store, you’ve seen hundreds before like it. Then you go next door—it has a distinct feel. There’s vibrant colors, a catchy name, cool artwork on the walls. Well, the experience with your Spring store is no different.
A great looking Spring store not only streamlines your fans shopping experience, it compliments the products inside it—making visitors more likely to purchase products. In fact, customizing your store can increase your conversion rates by as much as 35%.
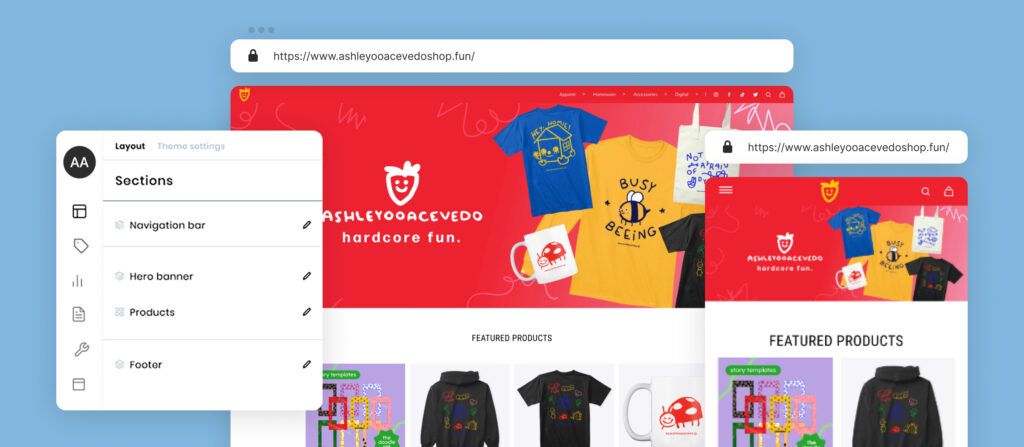
Take graphic designer and creator Ashley Acevedo, for example. Recently, she has done a total makeover of her custom store. The tagline in her header image sums up the new look, as well as newly launched digital and physical products—it’s hardcore fun. To level up your store like Ashley, here’s the 3 ways to do it:
- Add a custom domain
- Feature social media icons in your navigation bar and store footer
- Enhance your brand with design customization capabilities
Choose a custom domain
Connecting a custom domain bumps up your rankings on search engines, making it easy for fans to discover your store, as well as revisit it.
Ashley knew she wanted her online moniker “ashleyooacevedo” in her domain name—the name she goes by online. That’s how she landed on the domain name ashleyooacevedo.fun— instantly making her products more discoverable. When choosing a domain extension, instead of ‘.com’, she got lucky with ‘.fun’—fitting perfectly with her brand’s slogan, ‘Hardcore Fun’.
She tells us: “Since changing my domain name, I have seen a massive increase in sales. It really took my shop to another level and it feels so much more my own. My community also really love the catchy name.”
You can get a custom domain instantly through Spring, or connect one you already own. It’s easy.
Add social media icons
Your store should be an extension of your creator brand—so make sure there are pathways between your social media profiles and your store. With Instagram being her main platform, Ashley did exactly that, adding her Instagram profile link to her store navigation bar and footer.
Add your social media URLs too, via the Stores tab of your dashboard. To get started, head to the store editor now.
Customize your branding and colors
The fun part—you have the ability to edit the appearance and update branded elements of your custom store with ease, giving you full creative control. Edit your store banner and footer, add a logo, text color, insert buttons, alter your navigation bar, and more.
Ashley certainly had tons of fun updating hers: “I loved being able to add my own banner and branding! As a graphic designer, it’s really important to me to have my identity anywhere my audience can find me. It’s also super fun to customize my store to fit my style.”
Try it for yourself. Head to the “Stores” section of your dashboard and open up the store editor on the top right.
We can’t wait to see what you come up with.